
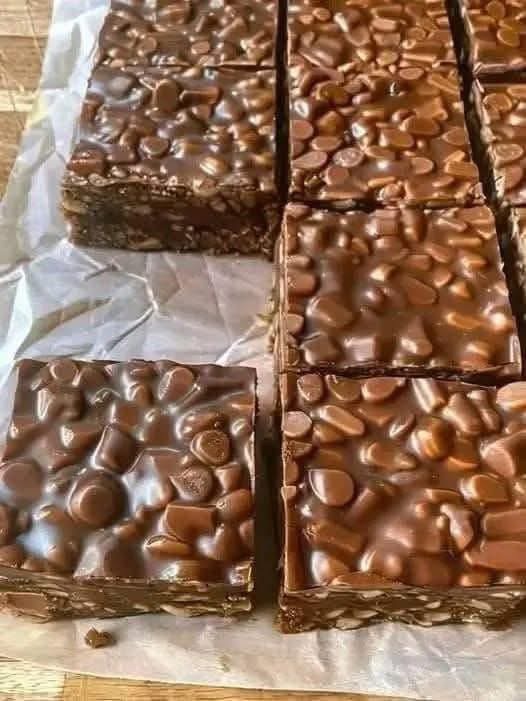
No-Bake Homemade Crunch Bars
These are incredibly easy, require just a few pantry staples, and taste like a cross between a Rice Krispie treat and a classic chocolate bar. They’re perfect for satisfying a sweet crunch craving.
Classic Chocolate & Cereal Crunch Bars
Ingredients:
· 3 cups crisp rice cereal (like Rice Krispies)
· 1 cup rolled oats (old-fashioned or quick)
· 1 cup creamy peanut butter (or sunflower seed butter for nut-free)
· ½ cup honey or maple syrup
· ¼ cup coconut oil or unsalted butter
· 1 teaspoon pure vanilla extract
· A pinch of salt
· 1 ½ cups chocolate chips (milk, dark, or semi-sweet)
· 1 tablespoon coconut oil or shortening (for thinning the chocolate)
Instructions:
- Prep: Line an 8×8 or 9×9 inch baking pan with parchment paper, leaving an overhang on two sides for easy removal.
- Mix Dry Ingredients: In a large bowl, combine the crisp rice cereal and rolled oats.
- Make the “Glue”: In a medium saucepan over low heat, combine the peanut butter, honey, and ¼ cup coconut oil. Heat gently, stirring constantly, until the mixture is smooth, melted, and well combined. Remove from heat and stir in the vanilla and salt.
- Combine: Pour the warm peanut butter mixture over the cereal and oats. Using a rubber spatula or wooden spoon, mix very thoroughly until every piece is evenly coated.
- Press: Immediately transfer the mixture to your prepared pan. Use the back of a lightly greased measuring cup or your hands to press it down very firmly and evenly. This is the key to bars that hold together.
- Melt Topping: In a clean, microwave-safe bowl, combine the chocolate chips and 1 tablespoon of coconut oil. Microwave in 30-second bursts, stirring well between each, until completely smooth. (You can also do this in a heatproof bowl over a pot of simmering water).
- Top & Set: Pour the melted chocolate over the pressed cereal layer and spread it into an even layer with an offset spatula or knife.
- Chill: Place the pan in the refrigerator for at least 2 hours, or until the chocolate topping is completely set and the base is firm.
- Slice: Using the parchment paper overhang, lift the entire block out of the pan. Place it on a cutting board and slice into bars or squares with a sharp knife. For clean cuts, you can wipe the knife with a hot towel between slices.
Key Tips for Success:
· Press Firmly! Don’t just pat it down. Apply serious, even pressure to compact the mixture so your bars aren’t crumbly.
· The Sweetener: Honey will make a firmer, chewier bar. Maple syrup yields a slightly softer, less sticky bar. Both are delicious.
· Customize Your Crunch: Swap out or add to the mix-ins!
· Add-Ins (add ½ cup): Crushed pretzels, chopped nuts, sunflower seeds, or mini marshmallows.
· Cereal Swap: Use cornflakes, bran flakes, or even crushed weetabix for a different texture.
· For a Quicker Set: You can put the pan in the freezer for 45-60 minutes instead of the fridge.
· Storage: Keep in an airtight container in the refrigerator for up to 2 weeks. They can soften at room temperature.
Popular Variations:
- Nutty Caramel Crunch Bars:
· Replace 1 cup of the cereal with 1 cup of chopped, toasted almonds or pecans.
· Drizzle the finished bars with store-bought or homemade salted caramel sauce before slicing.
- Chocolate-PB Double Decker:
· Skip the chocolate topping. Instead, sprinkle 1 cup of chocolate chips over the hot cereal mixture after combining in step 4, stir quickly to partially melt, then press into the pan. The chocolate will create swirls.
- Tropical Crunch Bars:
· Add ½ cup shredded coconut and ½ cup chopped dried mango or pineapple to the dry mix.
· Use white chocolate chips for the topping.
Enjoy your easy, delicious, and customizable homemade crunch!