
Here is a classic recipe for Butterfinger Balls—a no-bake dessert that combines the irresistible flavors of peanut butter and chocolate with the signature crunch of Butterfinger candy. These bite-sized treats are incredibly easy to make and perfect for parties, gifting, or satisfying a sweet tooth.
Butterfinger Balls
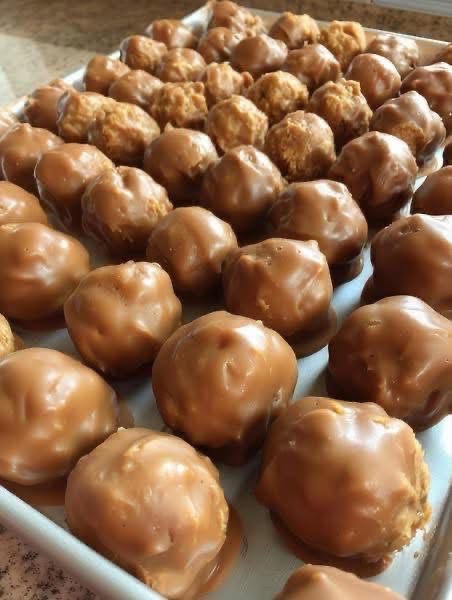
These are creamy, crunchy, and completely addictive little truffles that come together in minutes .
Ingredients
Ingredient Amount Notes
Creamy peanut butter 1 cup Use a standard brand like Jif or Skippy; avoid natural peanut butter as it’s too oily and the balls won’t set properly .
Unsalted butter ¼ cup Softened to room temperature .
Powdered sugar 1 cup Provides sweetness and helps bind the mixture .
Vanilla extract 1 tsp For flavor enhancement .
Butterfinger candy bars ~6 fun-size bars (½ cup crushed) Finely crushed .
Chocolate chips or melting chocolate 2 cups For coating .
Coconut oil or shortening 1 tbsp Optional, helps thin the chocolate for a smoother coating .
Instructions
- Make the Filling: In a large bowl, mix the softened butter and peanut butter until smooth and creamy . Add the powdered sugar, vanilla extract, and most of the crushed Butterfinger pieces (reserve a little for topping if desired). Stir until a thick, dough-like mixture forms .
- Form the Balls: Roll the mixture into small, 1-inch balls and place them on a baking sheet lined with parchment paper .
- Chill: Place the baking sheet in the refrigerator and chill the balls for at least 30 minutes. This step is crucial—it firms them up so they won’t fall apart when you dip them in warm chocolate .
- Melt the Chocolate: In a microwave-safe bowl, combine the chocolate chips and coconut oil or shortening (if using). Microwave in 30-second intervals, stirring well after each, until the chocolate is completely melted and smooth .
- Dip the Balls: Remove the chilled balls from the fridge. Using a fork or a dipping tool, dip each ball into the melted chocolate, turning to coat it completely. Let any excess chocolate drip off, then place the coated ball back on the parchment-lined sheet .
- Garnish (Optional): Before the chocolate sets, sprinkle the tops with the reserved crushed Butterfinger pieces for a decorative finish .
- Set and Serve: Allow the chocolate to set completely. You can let them sit at room temperature, but placing them back in the refrigerator will speed up the process . Once firm, they’re ready to enjoy!
Recipe Notes & Tips
· Chilling is Key: If the balls start to soften too much while you’re dipping them, pop the tray back in the freezer for 5-10 minutes to firm them up again .
· Variations: For extra crunch, try using crunchy peanut butter or mixing in some crushed graham crackers or Rice Krispies .
· Coating Options: You can also use white chocolate or dark chocolate for the coating, or even roll the finished balls in crushed pretzels or powdered sugar for a different twist .
· Storage: Store Butterfinger Balls in an airtight container in the refrigerator for up to 2 weeks, or freeze them for up to 3 months .
Enjoy your homemade Butterfinger Balls! Would you like to see more variations, like the Salted Caramel Core version ?