
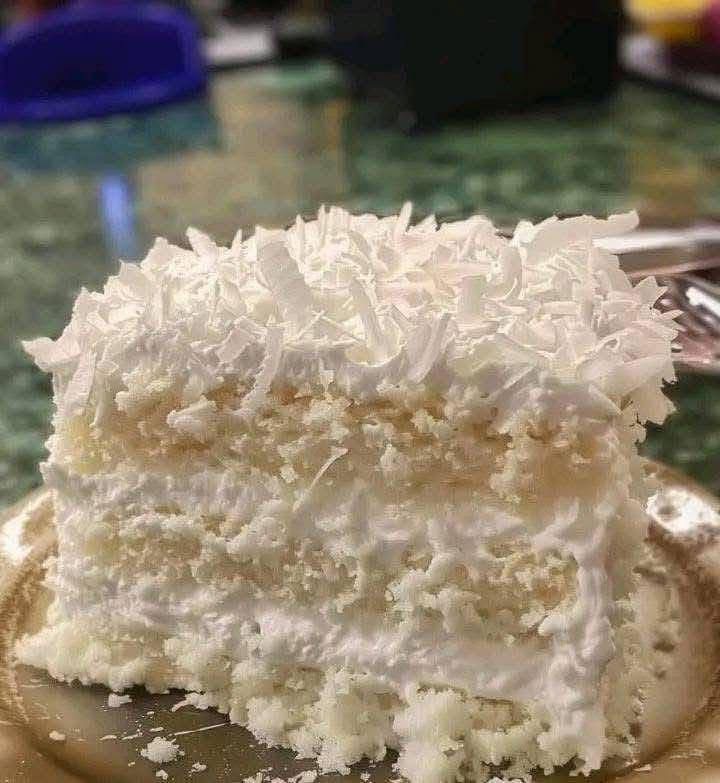
A Coconut Cake with Seven-Minute Frosting is a true classic—a stunning, old-fashioned dessert. The cake is incredibly moist and tender with a fine crumb, while the frosting is a fluffy, marshmallow-like cloud that is less sweet than traditional buttercream. Together, they are a match made in heaven.
Here is a detailed recipe from scratch, including the technique for the vintage Seven-Minute Frosting.
Old-Fashioned Coconut Cake with Seven-Minute Frosting
This recipe yields a beautiful two-layer cake, perfect for celebrations.
For the Cake:
· Prep time: 25 minutes
· Bake time: 25-30 minutes
· Cooling time: 1 hour+
For the Frosting:
· Prep time: 10-12 minutes (using a stand mixer or hand mixer with a double boiler)
Part 1: The Coconut Cake
This recipe uses the reverse-creaming method for a particularly fine, tender, and moist crumb.
Ingredients (Cake):
· 3 cups (360g) cake flour (spooned and leveled – crucial for a tender cake)
· 2 cups (400g) granulated sugar
· 2 teaspoons baking powder
· ½ teaspoon baking soda
· 1 teaspoon salt
· 1 cup (226g) unsalted butter, softened but still cool (cut into tablespoon-sized pieces)
· 1 cup (240ml) buttermilk, divided, at room temperature
· 4 large eggs, at room temperature
· 1 teaspoon vanilla extract
· 1 teaspoon coconut extract (or almond extract, for a classic “wedding cake” flavor)
· 1 ½ cups (120g) sweetened shredded coconut, plus more for decorating
Instructions (Cake):
- Preheat and Prepare: Preheat your oven to 350°F (175°C) . Grease and flour two 9-inch round cake pans. For extra security, line the bottoms with parchment paper rounds.
- Combine Dry Ingredients: In the bowl of a stand mixer fitted with the paddle attachment (or a large bowl with a hand mixer), whisk together the cake flour, sugar, baking powder, baking soda, and salt.
- Incorporate the Butter: With the mixer on low speed, add the softened butter pieces one tablespoon at a time, along with ½ cup (120ml) of the buttermilk. Continue mixing on low until the dry ingredients are moistened. Then, increase the speed to medium and beat for 2 minutes. This aerates the batter and develops the cake’s structure. Scrape down the bowl.
- Add Wet Ingredients: In a separate small bowl or measuring cup, whisk together the remaining ½ cup buttermilk, eggs, vanilla extract, and coconut extract.
- With the mixer on medium-low speed, add the egg mixture in three additions, beating well after each addition and scraping down the bowl as needed. The batter will be smooth and silky.
- Add Coconut: Fold in the 1 ½ cups of shredded coconut gently with a spatula until just combined.
- Bake: Divide the batter evenly between the two prepared pans. Bake for 25-30 minutes, or until a toothpick inserted into the center comes out clean and the cake springs back lightly when touched.
- Cool: Let the cakes cool in the pans on a wire rack for 10-15 minutes. Then, turn them out onto the rack to cool completely. The cakes must be 100% cool before frosting, or the frosting will slide off.
Part 2: The Seven-Minute Frosting
This is a vintage frosting made by cooking egg whites and sugar over simmering water. It creates a glossy, marshmallow-like frosting that pipes beautifully and covers a cake like a dream.
Ingredients (Frosting):
· 1 ½ cups (300g) granulated sugar
· ⅓ cup (80ml) water
· 2 tablespoons light corn syrup (helps stabilize the frosting and prevent crystallization)
· 4 large egg whites, at room temperature
· ½ teaspoon cream of tartar (also for stabilization)
· Pinch of salt
· 1 ½ teaspoons vanilla extract
· ½ teaspoon coconut extract (optional, to enhance the coconut flavor)
Special Equipment: You will need a double boiler or a heatproof bowl (like a stainless steel or glass bowl) that fits snugly over a saucepan of simmering water without touching the water. A hand mixer or a stand mixer is also necessary.
Instructions (Frosting):
- Prepare the “Double Boiler”: Fill a saucepan with 1-2 inches of water and bring it to a simmer over medium heat. Have your heatproof bowl ready to place on top.
- Combine Ingredients (Except Vanilla): In the heatproof bowl, whisk together the sugar, water, corn syrup, egg whites, cream of tartar, and salt.
- Cook over Simmering Water: Place the bowl over the simmering water (ensure the bottom of the bowl doesn’t touch the water). Whisk constantly but gently until the sugar is completely dissolved and the mixture is hot to the touch. You can test this by rubbing a tiny bit between your fingers—it should feel smooth, not grainy. This takes about 2-3 minutes. The mixture will look frothy.
- Whip Until Stiff Peaks:
· Option A (using a stand mixer): Carefully attach the hot bowl to your stand mixer (with the whisk attachment). Start on low and gradually increase speed to medium-high. Beat for 7 minutes. The mixture will increase in volume, become bright white, and form stiff, glossy peaks.
· Option B (using a hand mixer): Keep the bowl over the simmering water and beat with the hand mixer on high for 7 minutes. This is where the name comes from! You’ll need to hold the bowl steady. The frosting will be very thick and fluffy. - Add Flavor: During the last minute of mixing, add the vanilla extract (and coconut extract, if using). Beat until just combined.
- Use Immediately: Seven-minute frosting sets up quickly as it cools. You must use it right away to frost your cake.
Part 3: Assembly
- Level the Cakes: If your cakes have domed tops, use a serrated knife to level them, creating a flat surface.
- First Layer: Place one cake layer on your serving plate or cake stand. Spread a generous amount of frosting evenly over the top.
- Second Layer: Place the second layer on top, upside down (so the flat bottom is on top). This gives you a perfectly flat top for decorating.
- Crumb Coat (Optional): Apply a thin layer of frosting all over the cake to seal in crumbs. Let it set for 10 minutes.
- Final Frosting: Apply the remaining frosting all over the cake, creating swoops and swirls if desired.
- Decorate: Immediately press handfuls of sweetened shredded coconut onto the sides and top of the cake. The frosting acts like glue, so it will stick beautifully.
- Serve: Slice and enjoy! This cake is best served the day it is made, as the frosting can start to “weep” or absorb moisture from the air over time.
Tips for Success
· Room Temperature Ingredients: For the cake, ensure your eggs and buttermilk are at room temperature to create a smooth emulsion.
· Don’t Overbake: Coconut cake is best when moist. Check for doneness at the 25-minute mark.
· No Grease: When making the frosting, ensure your bowl and beaters are perfectly clean and free of any grease, or the egg whites won’t whip properly.
· Sticky Frosting: If the air is humid, the frosting may stay a bit sticky. This is normal for seven-minute frosting. You can try toasting the coconut you sprinkle on top for added texture.