

Introduction
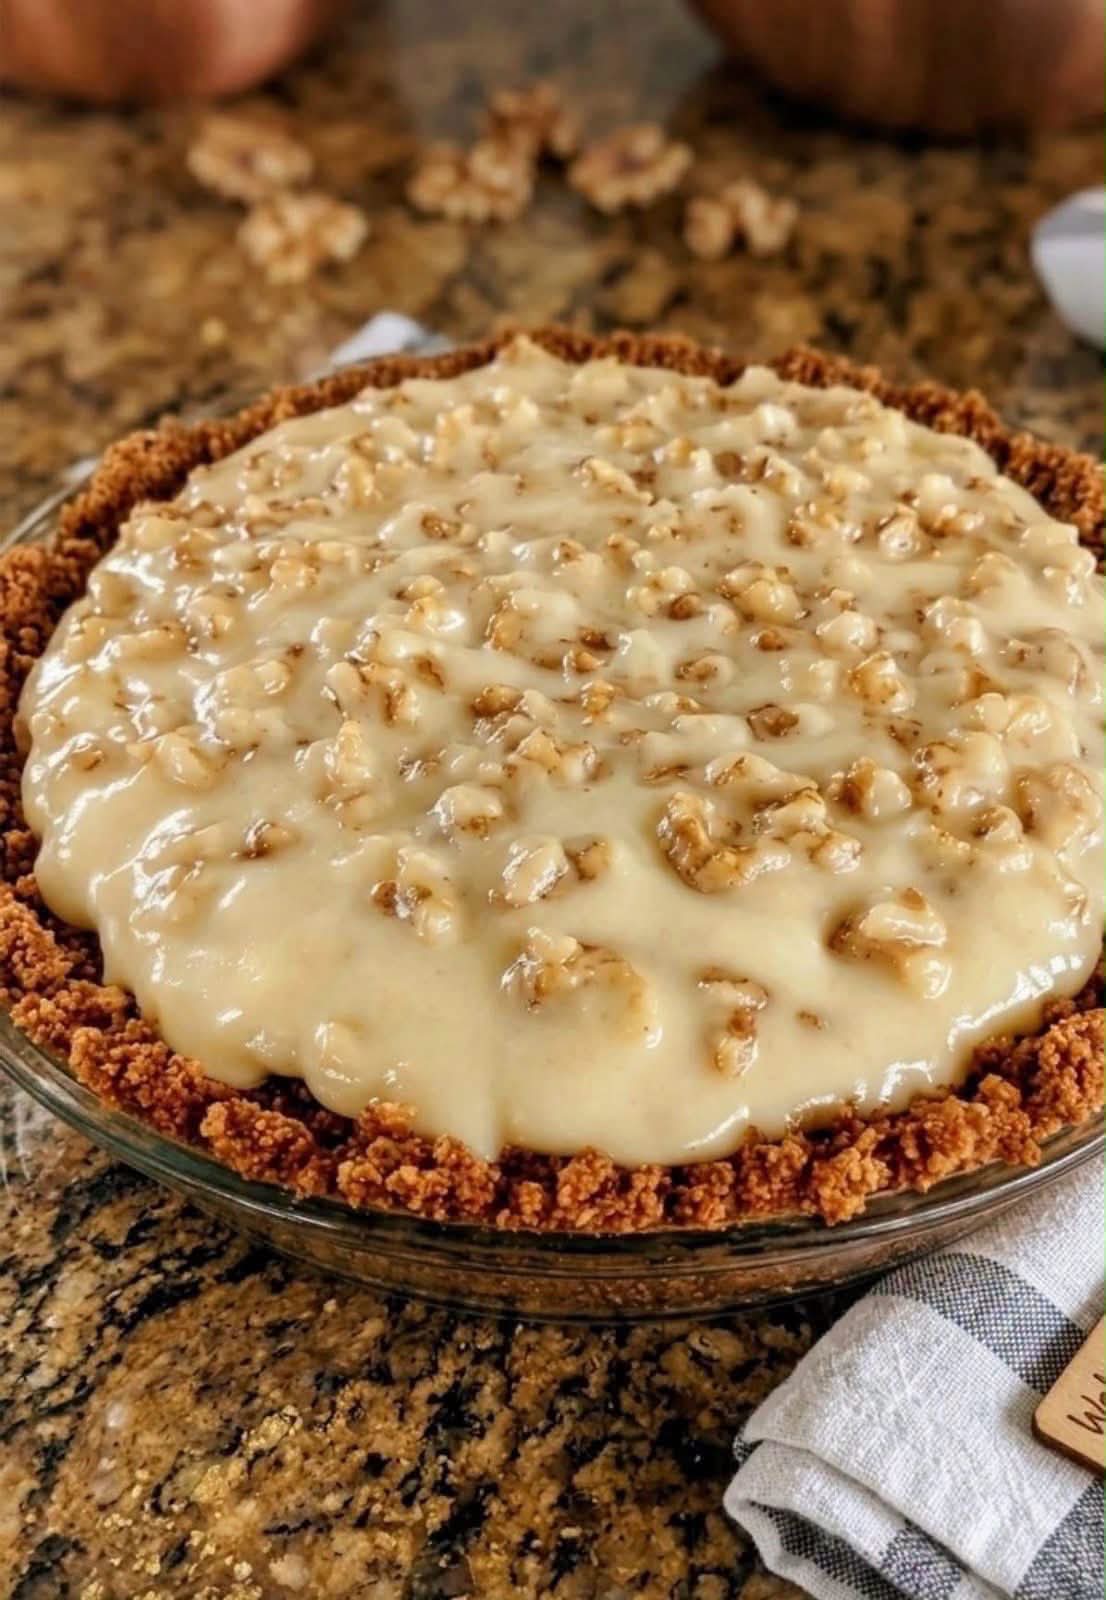
Prepare to be utterly captivated by the Walnut Cream Pie, a dessert that effortlessly marries rustic charm with sophisticated indulgence. This isn’t just any pie; it’s a luscious creation inspired by the irresistible allure of creamy textures and the satisfying crunch of toasted walnuts. Imagine a golden-brown crumb crust, rich with buttery notes and the earthy goodness of walnuts, cradling a silken, decadent cream filling generously studded with even more walnuts. It’s a symphony of textures and flavors that promises to be the star of any gathering, a comforting treat on a quiet evening, or the perfect capstone to a celebratory meal.
The Walnut Cream Pie stands out as a delightfully satisfying dessert for several compelling reasons. Its appeal lies in its harmonious balance: the sweetness is never cloying, perfectly complemented by the wholesome, slightly bitter notes of the walnuts. The preparation, while yielding a show-stopping result, is surprisingly approachable, making it a fantastic project for bakers of all skill levels. From the moment you take that first bite, you’ll understand why this pie quickly becomes a cherished family favorite, evoking feelings of warmth, comfort, and pure culinary bliss. It’s a dessert that invites you to slow down, savor each spoonful, and truly appreciate the simple elegance of well-chosen ingredients expertly combined.
This particular recipe for Walnut Cream Pie is designed to deliver maximum flavor with minimal fuss, ensuring a truly decadent experience. We’ve focused on creating a perfectly balanced crumb crust that offers a delightful contrast to the smooth, rich cream filling. Generous chunks of walnuts are not just a garnish but an integral part of the filling, adding depth and an exciting textural dimension. Whether you’re a seasoned baker looking for a new classic or a beginner eager to impress, this Walnut Cream Pie recipe is your gateway to a dessert that looks as impressive as it tastes, guaranteed to garner rave reviews and requests for seconds.
Nutritional Information
Per serving (approximate values, based on 8 servings per pie):
Calories: 520 kcal
Protein: 7g
Carbohydrates: 45g
Fat: 37g
Fiber: 3g
Sodium: 250mg
Ingredients
For the Walnut Crumb Crust:
1 ½ cups (about 150g) finely crushed walnuts (or a mix of walnuts and graham cracker crumbs)
¼ cup (50g) granulated sugar
½ teaspoon ground cinnamon (optional, but recommended)
6 tablespoons (85g) unsalted butter, melted
Pinch of salt
For the Silky Walnut Cream Filling:
1 ½ cups (360ml) whole milk
½ cup (120ml) heavy cream
½ cup (100g) granulated sugar
¼ cup (30g) cornstarch
3 large egg yolks
2 tablespoons (28g) unsalted butter
1 teaspoon vanilla extract
1 cup (approx. 100g) roughly chopped walnuts, lightly toasted
Pinch of salt
For Garnish (Optional):
½ cup (120ml) heavy cream, whipped
2 tablespoons powdered sugar (for whipped cream)
Extra walnut halves or chopped walnuts
Instructions
Prepare the Walnut Crumb Crust: Preheat your oven to 350°F (175°C). In a medium bowl, combine the finely crushed walnuts, granulated sugar, ground cinnamon (if using), and pinch of salt. Pour in the melted butter and stir until all the crumbs are moistened and well combined.
Press the mixture firmly and evenly into the bottom and up the sides of a 9-inch pie plate. For a truly sturdy crust, use the bottom of a flat-bottomed glass or a measuring cup to help press the crumbs down.
Bake the crust for 10-12 minutes, or until lightly golden brown and fragrant. Remove from the oven and let it cool completely on a wire rack while you prepare the filling. This step is crucial for a crisp base.
Make the Silky Walnut Cream Filling: In a medium saucepan, whisk together the granulated sugar, cornstarch, and pinch of salt. In a separate bowl, whisk the egg yolks until smooth.
Gradually whisk in the whole milk and heavy cream into the sugar and cornstarch mixture in the saucepan. Place the saucepan over medium heat, whisking constantly to prevent lumps.
Once the mixture begins to steam and is warm (but not boiling), slowly pour about half of the warm liquid into the whisked egg yolks, whisking continuously. This step is called tempering and prevents the egg yolks from scrambling.
Pour the tempered egg yolk mixture back into the saucepan with the remaining milk mixture. Continue to cook over medium heat, whisking constantly, until the filling thickens considerably and comes to a gentle boil. It should be thick enough to coat the back of a spoon. This typically takes about 5-8 minutes after adding the egg mixture back.
Remove the saucepan from the heat. Stir in the unsalted butter and vanilla extract until fully incorporated and melted. The butter adds richness and a beautiful sheen to the filling.
Fold in the 1 cup of roughly chopped, lightly toasted walnuts. Stir gently to distribute them evenly throughout the creamy filling.
Assemble and Chill the Pie: Pour the warm walnut cream filling into the cooled, baked walnut crumb crust. Use a spatula to spread the filling evenly.
Cover the pie loosely with plastic wrap, pressing the plastic wrap directly onto the surface of the filling to prevent a skin from forming.
Refrigerate the pie for at least 4-6 hours, or preferably overnight, until the filling is completely set and firm. This chilling time is essential for the pie to hold its shape when sliced.
Serve and Garnish: Once thoroughly chilled, remove the plastic wrap. If desired, prepare the whipped cream by beating heavy cream with powdered sugar until soft peaks form.
Slice the Walnut Cream Pie into wedges using a sharp knife. Serve each slice plain or topped with a dollop of fresh whipped cream and a sprinkle of extra walnut pieces for an elegant finish.
Cooking Tips and Variations
Achieving the perfect Walnut Cream Pie is all about paying attention to a few key details and embracing a bit of culinary creativity. For the crust, don’t overmix the crumb mixture once the butter is added; just combine until moist. The pressing step is crucial – a firm, even press will ensure your crust holds together beautifully when sliced. If your crust starts to brown too quickly during baking, you can lightly tent it with aluminum foil. For a truly no-bake crust, skip the baking and simply chill the pressed crust for at least 30 minutes before adding the filling, though baking enhances flavor and texture.
When it comes to the filling, constant whisking is your best friend. This prevents lumps and ensures a silky-smooth texture. Cook the filling until it coats the back of a spoon and you see a few gentle bubbles, signaling it has reached the proper thickness. If you’re nervous about scrambling the egg yolks during tempering, slowly add the warm milk mixture in a thin stream while whisking vigorously. To enhance the nutty flavor even further, lightly toast your walnuts before adding them to both the crust and the filling. This simple step brings out their natural oils and deepens their taste significantly.
Customization is where this pie truly shines. For a different crust, try using crushed gingersnaps for a spiced version, or vanilla wafers for a milder, sweeter base. You can also experiment with other nuts like pecans or almonds, or a blend of several. To add another layer of flavor to the filling, consider a pinch of nutmeg or cardamom, or even a tablespoon of instant espresso powder for a coffee-walnut twist. A drizzle of melted dark chocolate over each slice before serving creates a stunning visual and flavor contrast. For a boozy adult version, a splash of bourbon or rum in the filling can add wonderful depth. Remember, adequate chilling time is non-negotiable for a beautifully set pie that slices cleanly.
Storage and Reheating
Storing your Walnut Cream Pie properly is essential to maintain its freshness and delicious texture. Since this pie contains dairy and eggs, it should always be stored in the refrigerator. Cover the pie tightly with plastic wrap or aluminum foil, or place individual slices in an airtight container. When properly stored, the Walnut Cream Pie will stay fresh in the refrigerator for up to 3-4 days. It is not recommended to freeze this pie, as the creamy filling can change texture and become watery or grainy upon thawing.
This pie is best enjoyed chilled, directly from the refrigerator. Reheating is generally not recommended for cream pies, as the delicate filling can separate or become oily when warmed. The beauty of a cream pie lies in its cool, smooth consistency. If you prefer your pie less cold, you can let individual slices sit at room temperature for about 15-20 minutes before serving, but avoid letting it sit out for extended periods, especially in warm environments. Always return any uneaten portions to the refrigerator promptly.
Frequently Asked Questions
How can I prevent my crumb crust from becoming soggy?
To prevent a soggy crumb crust, ensure you bake it first as directed in the recipe and let it cool completely before adding the filling. The baking process helps to set the butter and create a barrier. Also, make sure your filling has cooled slightly before pouring it into the crust, as very hot filling can soften the crust prematurely. Chilling the pie for the recommended time is also crucial, as it allows the filling to set and prevents moisture from seeping into the crust.
Can I make this pie ahead of time for a special occasion?
Absolutely! This Walnut Cream Pie is an excellent make-ahead dessert. You can prepare and assemble the entire pie up to 1-2 days in advance. Store it covered tightly in the refrigerator. In fact, making it ahead often allows the flavors to meld and deepen, and ensures the filling is perfectly set, making for easier and cleaner slicing. Just add any optional garnishes like whipped cream or extra walnuts right before serving.
What if my filling doesn’t thicken?
If your filling isn’t thickening, it’s usually due to not cooking it long enough or not reaching a high enough temperature. Make sure you are whisking constantly over medium heat and allow the mixture to come to a gentle boil, where you see bubbles breaking the surface. The filling should be thick enough to coat the back of a spoon without running off easily. If it’s still too thin, you can try mixing an additional teaspoon of cornstarch with a tablespoon of cold milk or water, whisk it into the warm filling, and continue cooking for another minute or two until it reaches the desired consistency.